警告
この記事は古い為 sphinx-users.jp を参照してください。
第2日目 Sphinxでドキュメント作成を開始する
2日目はドキュメント作成用のひな形となる プロジェクト を作成しhtmlを生成します。
プロジェクト編集の基本的な流れ
下記の流れでドキュメント作成を進めます。
Sphinxのプロジェクトを作成
テキストエディタでreSTファイル(拡張子 .rst)の作成、編集
make html コマンドを打って、htmlファイルの生成
Sphinxのプロジェクトを作成する
Sphinxでドキュメント作成を始める際は、作りたいドキュメント毎に プロジェクト を作成します。
コマンドプロンプトを起動し、下記のような作業ディレクトリを作成します。
例 作業フォルダを
C:\work\sphinx\testprojectに作成する場合> mkdir C:\work\sphinx\testproject\ ※エクスプローラから作っても構いません。
カレントを作成したディレクトリにします。
例
C:\work\sphinx\testprojectの場合> cd \work\sphinx\testproject\
プロジェクトを作成するコマンドを打ち込みます。
> sphinx-quickstart
対話形式で進むので必要に応じて入力をします。必須なのは 4項目 だけですので、あとはEnterキーを押すだけです。
C:\work\sphinx\testdir>sphinx-quickstart
Welcome to the Sphinx 1.1.3 quickstart utility.

Please enter values for the following settings (just press Enter to
accept a default value, if one is given in brackets).

Enter the root path for documentation.
> Root path for the documentation [.]:
何も指定せずにEnterキーを押します。
You have two options for placing the build directory for Sphinx output.
Either, you use a directory "_build" within the root path, or you separate
"source" and "build" directories within the root path.
> Separate source and build directories (y/N) [n]:
何も指定せずにEnterキーを押します。
Inside the root directory, two more directories will be created; "_templates"
for custom HTML templates and "_static" for custom stylesheets and other static
files. You can enter another prefix (such as ".") to replace the underscore.
> Name prefix for templates and static dir [_]:
何も指定せずにEnterキーを押します。
The project name will occur in several places in the built documentation.
> Project name: learning
プロジェクト名を指定しEnterキーを押します。※例は learning という名前を指定
> Author name(s): hoge
作成者の名前を指定しEnterキーを押します。※例は hoge という名前を指定
Sphinx has the notion of a "version" and a "release" for the
software. Each version can have multiple releases. For example, for
Python the version is something like 2.5 or 3.0, while the release is
something like 2.5.1 or 3.0a1.  If you don't need this dual structure,
just set both to the same value.
> Project version: 0.1
プロジェクトのバージョン番号を指定しEnterキーを押します。※例は 0.1 を指定しています。
> Project release [0.1]:
次にリリース番号を聞かれますので拘りがなければ、そのままEnterキーを押して同じ番号にして下さい。
この後は対話形式が終わるまでEnterキー連打で構いません。
The file name suffix for source files. Commonly, this is either ".txt"
or ".rst".  Only files with this suffix are considered documents.
> Source file suffix [.rst]:
何も指定せずにEnterキーを押します。
One document is special in that it is considered the top node of the
"contents tree", that is, it is the root of the hierarchical structure
of the documents. Normally, this is "index", but if your "index"
document is a custom template, you can also set this to another filename.
> Name of your master document (without suffix) [index]:

Sphinx can also add configuration for epub output:
> Do you want to use the epub builder (y/N) [n]:
何も指定せずにEnterキーを押します。
Please indicate if you want to use one of the following Sphinx extensions:
> autodoc: automatically insert docstrings from modules (y/N) [n]:
何も指定せずにEnterキーを押します。
> doctest: automatically test code snippets in doctest blocks (y/N) [n]:
何も指定せずにEnterキーを押します。
> intersphinx: link between Sphinx documentation of different projects (y/N) [n]:
何も指定せずにEnterキーを押します。
> todo: write "todo" entries that can be shown or hidden on build (y/N) [n]:
何も指定せずにEnterキーを押します。
> coverage: checks for documentation coverage (y/N) [n]:
何も指定せずにEnterキーを押します。
> pngmath: include math, rendered as PNG images (y/N) [n]:
何も指定せずにEnterキーを押します。
> mathjax: include math, rendered in the browser by MathJax (y/N) [n]:
何も指定せずにEnterキーを押します。
> ifconfig: conditional inclusion of content based on config values (y/N) [n]:
何も指定せずにEnterキーを押します。
> viewcode: include links to the source code of documented Python objects (y/N) [n]:
何も指定せずにEnterキーを押します。
A Makefile and a Windows command file can be generated for you so that you
only have to run e.g. `make html' instead of invoking sphinx-build
directly.
> Create Makefile? (Y/n) [y]:
何も指定せずにEnterキーを押します。
> Create Windows command file? (Y/n) [y]:
何も指定せずにEnterキーを押します。
Creating file .\source\conf.py.
Creating file .\source\index.rst.
Creating file .\Makefile.
Creating file .\make.bat.

Finished: An initial directory structure has been created.

You should now populate your master file .\source\index.rst and create other documentation
source files. Use the Makefile to build the docs, like so:
   make builder
where "builder" is one of the supported builders, e.g. html, latex or linkcheck.
これでプロジェクトの作成は終了です。いくつかのディレクトリとファイルが生成されているので確認してください。コマンドプロンプトでdirコマンドを打ちましょう。 ※もちろんエクスプローラで確認しても構いません。
C:\work\sphinx\testdir>dir /b

conf.py
index.rst
make.bat
Makefile
_build
_static
_templates
HTMLを生成する
最後にHTMLを生成してみましょう。コマンドプロンプトで make html コマンドを打ちます。
C:\work\sphinx\testdir>make html

Making output directory...
Running Sphinx v1.1.3
loading pickled environment... not yet created
building [html]: targets for 1 source files that are out of date
updating environment: 1 added, 0 changed, 0 removed
reading sources... [100%] index

looking for now-outdated files... none found
pickling environment... done
checking consistency... done
preparing documents... done
writing output... [100%] index

writing additional files... genindex search
copying static files... done
dumping search index... done
dumping object inventory... done
build succeeded.

Build finished. The HTML pages are in _build/html.
正常に終了していれば
\_build\html配下にhtmlが生成されているはずです。C:\work\sphinx\testdir>dir /b _build\html .buildinfo genindex.html index.html objects.inv search.html searchindex.js _sources _static
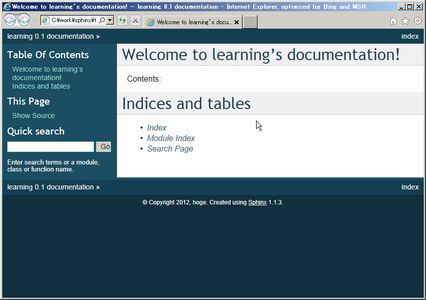
続けて index.html をWebブラウザで開いてみましょう。コマンドプロンプトから
_build\html\index.htmlと打てばWebブラウザでindex.htmlが開きます。C:\work\sphinx\testdir>_build\html\index.html
以上でプロジェクトの作成からhtmlの生成まで一通り流しました。明日からはいよいよドキュメントの編集に入ります。
※ このアドベントカレンダーについては このアドベントカレンダーについて を参照して下さい。